Showing posts with label birthday cake. Show all posts

Monday, January 09, 2023

birthday cakes 2022

 Y'all, we had a big birthday to celebrate in 2022 - we've hit the teen years!  

The Boy turned 13 - THIRTEEN!!!!!!!!!!! - which seems impossible to me because while I might not be able to remember what I did yesterday, I remember all the painful details of the days and days it took for him to be born.  

His cake request was simple (and moody) - a chocolate cake with blue icing.

Knowing how horrific my decorating skills are, I covered it in sprinkles, artfully leaving 2 shapes in the middle that vaguely resembled a one and a three.

(Let's not speak of the little round turds edging the top of the cake.)


A month and a few days later it was The Girls turn.  She hemmed and hawed until she was running out of time and then decided she wanted a cake decorated like a sloth.  I said no.

No other cake would do though, so I ordered a sloth cake topper from the hellscape of the online company that starts with A and ends in mazon, even though they lost multiple orders of ours this Christmas, and hoped that at least that package would show up, since none of the other ones did.

Thankfully it did.

She requested a blueberry cake, also with blue icing, and it looked basic but cute.


 Everyone was happy and both cakes and frostings were too sweet, but these special days don't last long.  Time keeps on slippin', baby. 


Monday, July 19, 2021

how to - make a beer can "cake"

 I wanted to do something fun for The Mister's birthday this year.  He loves beer, specifically trying craft beers from different places, and the liquor stores around us have pretty good selections, so I made him a beer can cake.

These are all over Pinterest, should you need more information or inspiration, but because I am not very crafty, I took the basic "stack cans of beer together" and went with it.  I went to the liquor store and bought 10 cans of beer; 6 "tall" and 4 "regular", then hit the dollar store for some ribbon.  They didn't have any nice ribbon so instead I bought a roll of burlap (MANLY!) and purple yarn.  I also found some tiny lights to use in place of candles on the top of the cake.

I used tape to hold the 6 tall cans in place on the board and to each other, then clumsily tied some burlap and yarn around it to make it purdy.

 I realized once I was done that I should have wrapped the cardboard tray in wrapping paper to make it pretty too.  Fortunately my family knows how bad I am at all of this so no one cared or commented.

 My plan had been to make a second layer out of 3 cans and then the top layer with one, but I didn't like the way the 3 cans looked, so I used 4 cans for the second layer and stole one of The Misters beers from the fridge to make a top layer. 

I plopped a ribbon on top and strung the little lights all over my magnificent creation.

And it looked super cute once it was all lit up!


 Everyone was impressed and kindly ignored all the visible tape holding everything together.  These guys are the best.

Wednesday, March 24, 2021

black forest tart

 I asked The Mister what kind of cake he wanted for his birthday and after much consideration he was torn between a black forest cake and "I don't care, you pick".  

Of course I wanted him to have whatever cake he wanted for his birthday, but I am not the biggest chocolate cake fan, I've never made a black forest cake before, and they are multilayered, meaning a big cake, which we really don't need.

I did some googling, thinking I could maybe find a recipe for individual cakes or another twist on the dessert and indeed I found the most perfect twist - a tart!

For the tart dough I used this recipe from Tasty, and for the rest I just did what I wanted to.

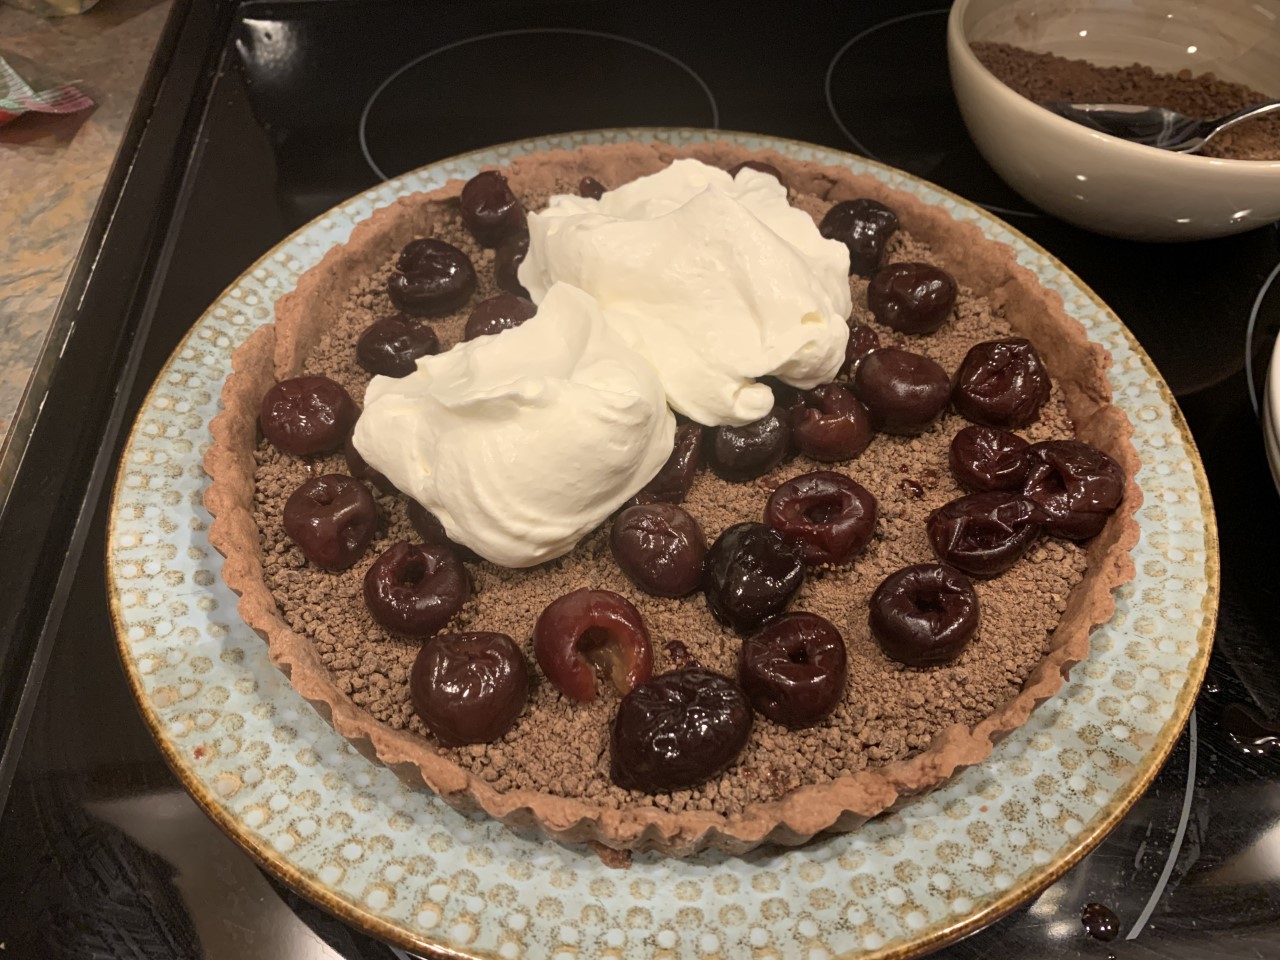
Since BFC's are usually finished with chocolate shavings or what have you, I wanted to add more chocolate than just the crust.  I first thought I might melt some chocolate and cover the tart bottom and sides with it, but then I worried it might be too difficult to eat, trying to get your fork through a layer of hardened chocolate.  So instead I whizzed chocolate chips in the food processor down to a powder, and sprinkled that over the tart shell.


 For the cherries, I used frozen ones from Costco, which I like to have in the freezer for smoothies or to sprinkle over yogurt.  I thawed them out for a few hours before assembly.

The kids had wandered in "to help" but most of their help was asking when I was going to make the whipped cream so they could have some, and telling me that the cherries looked bad and they didn't want to eat that part.  So helpful.

I had planned to put more cherries than this on, but I was getting tired of listening to the kids telling me how bad it looked and they wanted pieces without cherries.  

Then I whipped the cream with some sugar and vanilla, and plopped it on top to cover the cherries from my childrens view.

My smallest helper and loudest critic stepped up at this point to sprinkle more chocolate over the top, or just dump it by spoonfuls in the same spot over and over.

Lots of whipped cream, chocolate and cherries - what a dessert!  Super easy and super delicious.

Sunday, January 31, 2021

2020 birthday cakes

 Some things changed (which kids cake I messed up this year), and some things stayed the same (my kids love sugar).

The Boy is still obsessed with The Simpsons, and he wanted another Simpsons cake.  I found online a cake with a photo of Homer reaching up on the cake for doughnuts (homemade of course), but we swapped it out for Timbits. 

I bought a couple of 6 inch cake pans so I could get good height on the cake without it being super huge.  I made the cake and icing from scratch, printed the Homer photo, and sent The Mister to Timmy's for the Timbits.

It came together perfectly, into a super cute cake:


 The Boy loved it; he and his sister had plenty of sugar, and everyone was happy.

Recipes I used :

6 inch 3 layer cake recipe 

 vanilla buttercream 

A month later it was The Girls turn and I am not ashamed to admit, I was worn out.  When she (finally!) decided on a candy cake, I decided to go the easy route and use not only box cake mix but also store bought frosting.

I was going to make a Pinata cake full of candy, so I knew it had to be assembled the day of her birthday so the candy inside wouldn't go all gross.  I baked the 4 layers of cake the night before and was up nice and early to knock the cake out of the park.

Pretty much right away I realized that a 4 layer, 9 inch cake was going to be way bigger than we needed, so I changed it to 3 layers.  Then to make sure I had plenty of room for the candy I cut a very large hole in the middle layer.  Too big, I would realize later.  As soon as I started frosting the bottom and middle layers together, I realized I probably hadn't bought enough frosting.

I kept plugging along, trying to frost sparingly to make sure I had enough frosting left for the outside, but it sure didn't look good.

I  mean, it really didn't look good.


In addition to the tubs of white frosting I'd also bought a can of frosting with a variety of nozzles you could use to do your final decorating.  I wasn't going to be able to save that for the decorating, I was going to need it to try to frost the cake.

The spray can of frosting was A PIECE OF GARBAGE.  It was hissing and spitting and would randomly stop dispensing frosting and just shoot out air.  The cake looked bad before; now it looked hideous.

I was hysterical with laughter by this time - what good would getting frustrated and upset do?  The cake looked terrible and I couldn't stop laughing.  I laughed so hard I cried.  Eventually I pulled myself together and smoothed the pink frosting into the white and it just barely covered the whole cake.  Almost.


The good thing about 6 year olds is that if their cake is covered in candy, they don't give a hoot what it looks like.

After we ate some cake, (sooooo sweet) I told The Mister that he's in charge of birthday cakes in 2021.  Mom needs a break.


Saturday, September 12, 2020

Cornflake Cake

My Boo (eternal BFF) and I had a socially distanced birthday lunch for her this summer, and I decided it was the perfect time to try out a saved dessert recipe, a chocolate cornflake cake.  Well, "cake".  It isn't a true cake.  But there is a lot of chocolate.  What else do you need?


This Chocolate Cornflake Cake (which is apparently a favorite of the Queen's) was very easy to make, although not super pretty.

It did look a little nicer with its ganache topping.  I was so excited about the lunch I forgot to make the salty buttery cornflake topping.

One thing I will say is that this is a FIRM "cake".  The recipe says to let the cake sit at room temperature before serving.  This one sat out for more than an hour and it was still difficult to cut. 


We hacked off a piece to keep and served it for dessert to The Grandpa that night, and he was also a fan.  Another no bake dessert win.

Thursday, February 06, 2020

Birthday Cakes 2019


Birthday cake season has come and gone and whoooo, it was a nail biter!

Both kids had strong, ever changing opinions on their cakes, and every time I tried to nail down specifics a new idea popped into their heads and we were back to square one.

The Boy finally decided on a doughnut cake, Simpsons style, meaning pink with sprinkles.

I found a recipe for a bundt cake that tasted like a doughnut, so I whipped that up, let it cool, and then popped it out of the pan.

Almost.


DANGIT.


I carefully pried the stuck piece out of the pan and tried to stick the pieces back together using the power of my mind.  When that didn't work, I used toothpicks instead, and instructed The Mister to make sure I removed the 'picks before serving.

Can you spot the toothpick(s)?


I made a pink glaze for the top and sprinkled it with gold sugar because of course I forgot to buy real sprinkles for the top.


And guess what else we forgot?  TO REMOVE THE TOOTHPICKS BEFORE SERVING IT.
Lord.

The Boy loved it and it tasted pretty good, so that's all that matters.

_________________________

Her brother's birthday always throws The Girl into a frenzy about her own - what she would like to eat, what gift she would like, her cake.....
The cake ideas changed almost daily until I put my foot down a couple of days before her birthday and told her to pick.....an easy one that I could actually produce.

She settled on a cotton candy cake, and friends, I have no story to tell you other than it was a pretty cute cake.


I even marbled the dang thing because I was feeling so good about it.


My only wish was that I could have found fluffier cotton candy for the top but whatevs, look at these cakes!  It was a good time.  My babies are happy and healthy and loved their cakes.  Life is good

Friday, February 01, 2019

Unicorn Birthday Cake - or, Thank God Four Year Olds Don't Have High Standards

So The Girl is like many other kids out there and is currently obsessed with unicorns. 
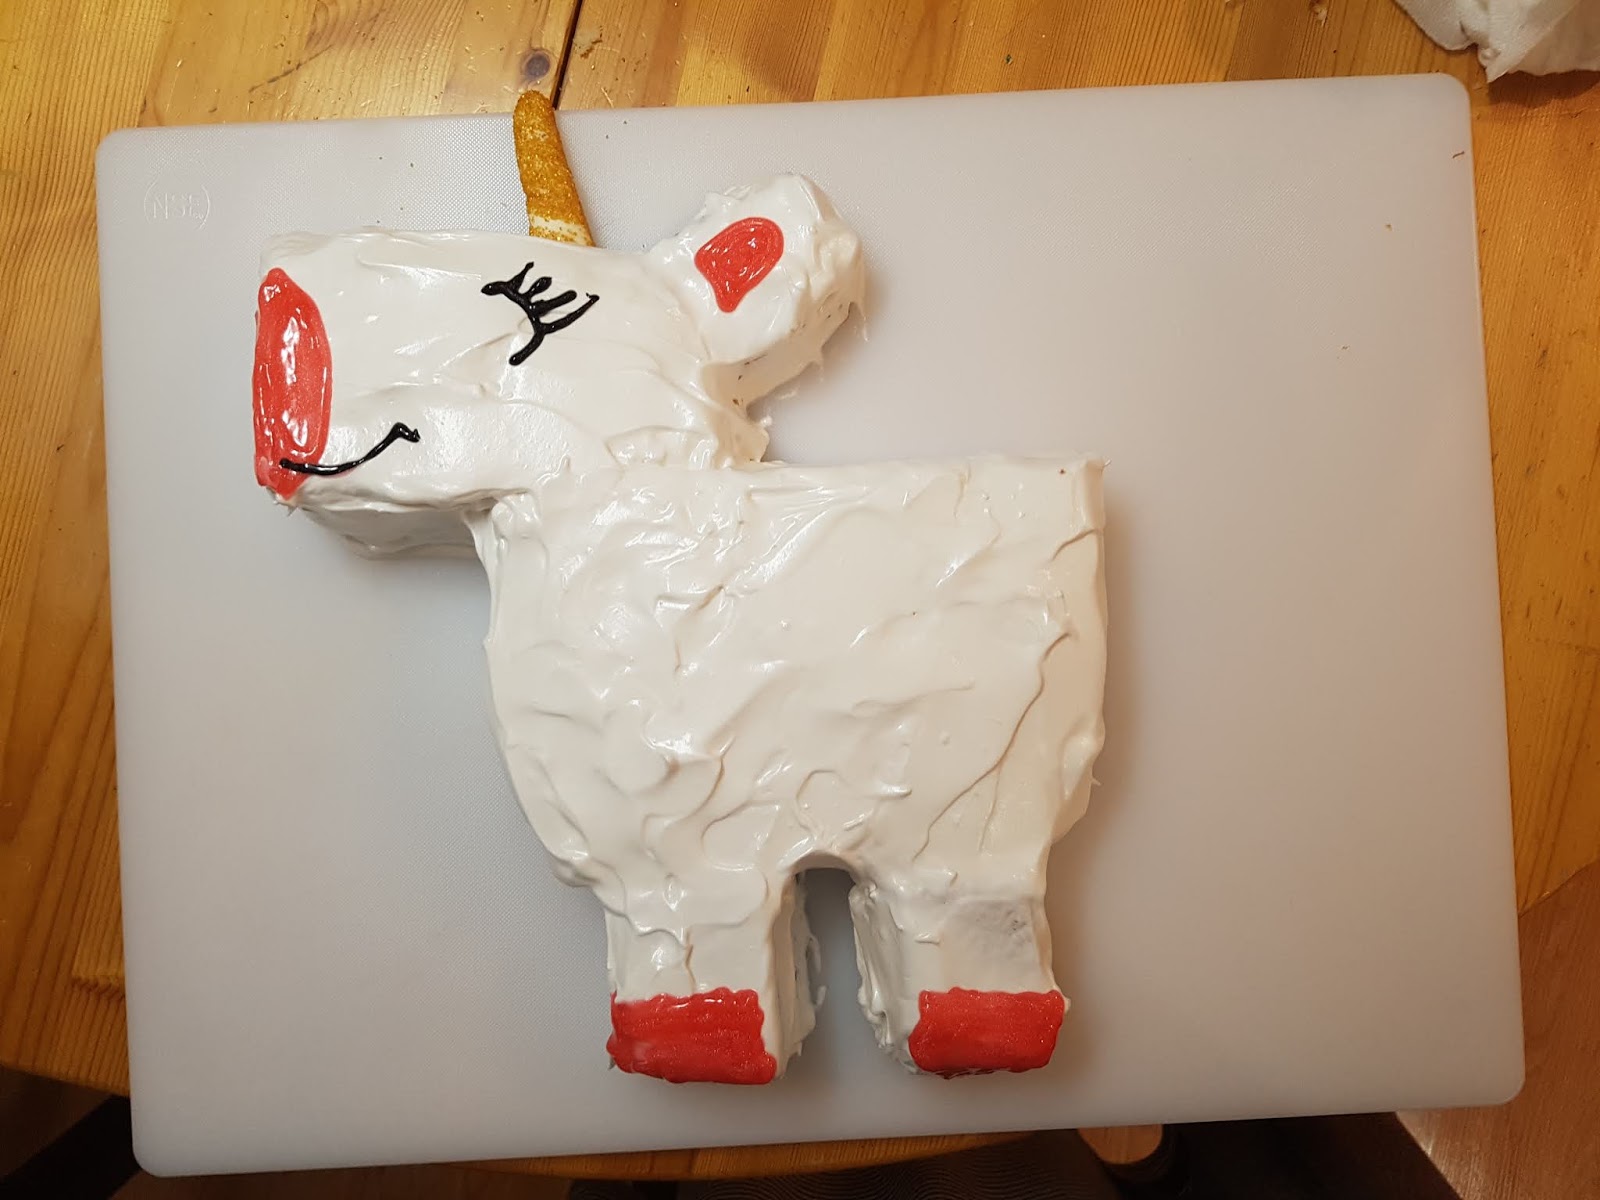
I remembered a video someone had shared on The Facebook about how "easy" it is to make a unicorn (or lots of other animals) out of a 9x13 pan cake.
It was her 4th birthday!  A fancy cake was needed!  And so I went for it.

I made the cake (box mix with sprinkles mixed in) the day before her birthday and so the morning of, I was up early to knock this thing out of the park and wow my family.

I realized right away that I hadn't thought about what I would serve the cake on, and I knew we didn't have any sort of tray or pan big enough to hold it.  I knew The Mister would not be excited if I woke him up at 5am to share this info, so I wandered around the kitchen for a bit before deciding I would have to cover my biggest baking sheet with foil and use the back of it.

I covered the pan in foil, and briefly felt a little sting on my hand, but I was too busy getting nervous about how wrong this was all going to go to give it much thought.

Following the video, which by now I had watched 20 times, I made my first cuts:


I started to move the pieces to the unicorn shape when I noticed something red smeared on my hand and on a bit of the cake.  It was blood.  I had cut the palm of my hand on the TINFOIL and was bleeding onto the CAKE.  Nice.


I bandaged myself up, cleaned up all the blood, and trimmed the blood off the cake.  Thank God no one was awake and watching this.
I had realized already that the tray covered in foil looked like crap BEFORE I got blood everywhere, so I trimmed the cake down a smidgy more and left it on the cutting board.


A month before The Girl's birthday, The Boy had his birthday.  I had a cake plan in mind and some ingredients bought - he is very much into Harry Potter lately and I thought he might like a cake like the one Hargid made for Harry - but then a couple of weeks before his birthday he announced that he wanted a totally different cake, so I had the package of white icing and a tube of pink icing already in the cupboard.


I bought the icing at Bulk Barn, it was some sort of "professional" icing that all you had a to do was add water to and whip.  I had planned on following the video and piping little dots/blobs all over the cake, but this was not that sort of icing.  
The pink tube icing went on sort of ok, but it was heavier than the white icing and it was looking like it was going to slide right off the hoofs - which it actually did a few hours later.
The black tube icing was a real pain in the ass and I was getting very frustrated that I couldn't get it quite where I wanted it.
Also, I feared the unicorn looked more like a pig.


I started working with the little tub of fondant I'd bought at Michaels, and it was wayyyy harder than I thought.  I was getting pretty unhappy about the whole thing.  At this point, The Boy woke up and came into the kitchen and was so excited about how the cake looked.  He flattered me enough to keep me going, and together we managed to get that damn fondant shaped into a horn and tail.


The video we were following also had a rainbow mane, but we didn't have a big enough unicorn to fit one in nicely.


The girl was beyond thrilled with her cake, which made all the blood loss, sweat and tears worth it.

One super weird thing that happened, that you can see the starting of in the last photo, is that the white icing actually began  to dissolve in spots shortly after the cake was done.  The icing on the right leg above you can see it looks almost bubbly.  So odd.

Very awesome YouTube video here .
 

Tuesday, February 13, 2018

Princess cake

Both kids have birthdays at the end of the year - November and December, about a month apart - and once The Girl got to help decorate her brother's birthday cake for his party, she became quite interested in her own upcoming cake.

"A BIG cake!  A THOMAS cake!"  She announced, and struck fear into my soul because I am in no way artistic or creative please see pretty much any of the posts here if you don't believe me.

Now, she doesn't even really like Thomas much anymore, so I think it was just the first thing that popped into her head.  I panicked, and replied with the first thing that popped into my head - wouldn't you rather have a princess cake?  YES!  She replied enthusiastically,  and then talked non stop about it for the next month. 

Now, before anyone rolls their eyes at me, trust me that this was not a sexist Girl can't have a Thomas cake thing.  It was a I remember my Boo (aka BFF) made a princess cake for one of her daughters a few years back and she said it was so easy that even I could do it thing.

The Big Day came, and my Boo came over to get me started.

The night before I had made the cakes- 2 - one in round pans, and one in a large measuring cup my Boo had lent me.


I wrapped the dolls legs in plastic wrap and we hacked one of the round cakes up to make a bottom and a top to go around the measuring cup cake.
I used this buttercream frosting and we dyed it pink.


My Boo got the decorating started, and then turned the reins over to me.  The kitchen and the icing got warmer, the kids were all amped up, and my little frosting blobs were not turning out as neat as hers. But hey, 3 year olds don't have super high standards.


I was starting to get fatigued by the time I got to the lower part of the dress, so I added some purple food coloring to the pink frosting and tried my hand at a big swirly design to hurry it along.  
If you stand back and squint a lot, it doesn't look too bad.


What matters most is the The Girl loved it - a lot - so that made my day.
And I'm in the clear on kids birthday cakes for 9 more months!

Sunday, May 14, 2017

Cookie Cups

We have, much to the chagrin of myself and my expanding body, apparently become dessert people.  This has been caused by our Family Sunday Dinners with The Grandparents, so I blame them fully and completely.  It just doesn't seem like a complete dinner without something for dessert.  A terrible habit, which I want to break.  
But anyway, this dessert was for The Grandmother's Birthday!  I wanted to do something small, so there wouldn't be a lot of leftovers, and something a bit different.  I found this on Buzzfeed - cookie cups filled with no-bake cheesecake filling.

The cups were simple enough, although I balked at pressing the (store bought) dough into the muffin tins - I was afraid they would be impossible to remove, because it was taking a heck of a lot of force to squish it into the tins.  So instead we (The Mister helped with 2 before he lost interest and wandered away) flattened them into rounds in our hands and then formed them in the cups.  I don't know how easy they come out the original way, but these ones popped right out after baking and a few minutes of cooling.  

The filling was cream cheese, cool whip, powdered sugar and vanilla. I didn't really follow the amounts, I just tossed in what I thought looked good.  I really really loved the filling.  I could have eaten a big bowl of it as is, but I didn't, thank God.


Here they are plated up and waiting while we hunted for a replacement candle for the one that broke in transport.  Admittedly they look very plain, but they were very very delicious.  I am not a big fan of cool whip, so I probably wouldn't make this particular filling again (but it was very good!) but the cookie cup idea I hope to remember, because they would be equally fun filled with fruit, ice cream, or even whipped cream.

Monday, January 23, 2017

Birthday cake


2!  Good gravy.  It's loud over here, y'all.

I was completely out of cake ideas for the big day, so I resorted to asking the (not yet 2) birthday girl what kind of cake she wanted.
"Strawby."

Ok, sure, it's December, but a strawberry cake you shall have!

I found the exact same recipe on Pinterest over and over, with differences in the method, and most of them didn't make sense, so this is what I did to end up with a pretty nice Strawby Cake.

3 cups flour
2 cups sugar
1½ T baking powder
¾ t salt
¾ cup vegetable oil
1½ cups pureeed strawberries
1 t vanilla
1 t lemon juice
4 eggs

Pureed strawberries - just throw your strawberries (thawed if using frozen) into a blender or food processor and whiz until smooth.

Note:  Even though your batter will be a pretty pink, your cake will not.  If that's important to you, add some food coloring.

Beat the sugar and oil together until thick and smooth.  Add the vanilla and lemon juice and beat again.  Add in the flour, baking powder and salt,and mix.  Add 2 eggs, mix again, then add the other 2 eggs.

Pour cake into pans - this is a lot of batter, so you'll need a big bundt pan, or square pan, or at least 3 9" cake pans.

Bake at 325' for 20-30 minutes, checking at 20 if you think the cake is getting close.

Remove from oven, let sit 10 minutes, then remove from the pan and let cool completely.

Delicious with whipped cream!

Monday, April 18, 2016

Coconut Cupcakes

I asked The Mister what sort of birthday dessert he'd like, and his 
response was - "Something with coconut". 
I knew just the recipe - the coconut cupcakes from Ina Garten's Barefoot Contessa Cookbook.  
I'd wanted to try it for my cookbook shelf purge recipe testing, but it didn't make the cut.

This makes a LOT of cupcakes.  
It fed us for the birthday dinner, I sent some home with my parents, gave some to 
our friends, and still had a bunch left over to take to work.  
They sure are good though.  
Warning - the recipe makes a ridiculous amount of frosting.  
More than you could ever want or need.  I halved the recipe and still had a ton 
left after frosting all 11,472 cupcakes.


Monday, November 12, 2012

Best dessert - Bacon Cheesecake

I had my eye on this recipe for bacon cheesecake for a while, but I was hesitant to make them. On one hand - bacon? cheesecake? really? On the other - when has bacon ever let us down? 

I made them for my boss' birthday and they were a huge hit. The cheesecake itself is quite nice, but the candied bacon just throws it over the top and makes them beyond amazing. I am not kidding.


I made them for my mother in laws birthday as well. I left a few bare in case the idea of bacon on cheesecake was too weird for the family. 


It wasn't, and they were devoured by all, including the kids, although Pax wasn't super enthusiastic, and stopped after one. He was the only one. 

Try this recipe!!!! 

My only adjustment to this recipe the second time around was to chop the bacon coarsely rather 
than have large pieces on top of each 'cake.

Sunday, September 30, 2012

Hambuger cupcakes

My co-worker and her sister made these totally adorable cupcakes for a party last summer. They brought in a few to work as well.

I thought they were the sweetest thing, and after reading the directions, I knew they would be a perfect birthday dessert for my mother in law, as a follow up to the cake balls I made her for her birthday in 2010.


So last summer, I baked the cupcakes and brownies at home, sliced the cupcakes, cut out the brownie patties, and dyed the icing red, yellow and green.  I placed them in a cooler, and we went to the lake to my mother in laws trailer to celebrate her birthday.

I had planned to take the icings out of the cooler after dinner and let them soften a bit before assembling.  However, while we were eating dinner some of the family members announced that they were leaving right after we finished eating.  This was unexpected, and my sister in law and I had been hoping to have all the family there for dessert, so I ran into the trailer to start decorating while my sister in law asked the people leaving to hold on for a few more minutes. 

It was more difficult to try to decorate with the very cold and firm icing, and the time restrictions.  So they were not as cute as I'd hoped.  And I forgot the sesame seeds on the buns.  And this is the only picture I took.


But there were still cute, and delicious, and everyone loved them.
My sister in law said I beat the cake balls by a mile. But then she liked THIS years birthday dessert even better than the cupcakes.....

Friday, October 08, 2010

Balls! Of Cake!

I'm sure you've all seen cake balls before, they've been floating around the internet for a couple of years now, most noticeably by Bakerella, who makes some phenomenal stuff.

This summer I was reading a parenting magazine that had an article about food on sticks for kids, and they had done cake pops, cake balls on sticks, with a sugar glaze instead of a dipped chocolate crust. I thought they looked fun and easy and it just happened that I needed to make a dessert for an upcoming family birthday.

I gave them a test run and while we enjoyed the cake balls, the glaze didn't work very well. Also, the dessert was going to have to travel to a different city and be stored overnight in a hotel fridge, so doing cake pops with sticks wasn't looking like a good idea. So we stuck with the balls.

Here is Bakerella's post on cake balls, if you'd like to see.

So you bake a cake. I made a box cake mix, I believe it was butter pecan. Bake it and let it cool. They break it up with your hands into fine crumbs.


Then you add frosting, again store bought. I used cream cheese frosting. Bakerella's tutorial uses a whole can and the magazine article used 1/2 a can. I used about 3/4's. Plop in the frosting and mix well until evenly incorporated and the cake will hold together in balls and you like the taste. Then form into balls. You could use a little scoop, but I just used my hands. I went fairly small, so the balls could be 1 or 2 bites. I got about 60.  Cover with plastic wrap and chill in the fridge for a couple of hours. 


Then you've got to coat them in something, cause they aren't very cute naked. As I said the glaze (powdered sugar and milk) didn't work for me, so I bought some of those candy chips from Michaels to dip them in. I am not very good with finicky stuff, so they didn't come out smooth, and some didn't even get a very good coating, but they looked not bad. I stuck them in little candy papers. And chilled again in the fridge.


Because these were for a birthday, I set some aside plain and some we "decorated" with icing tubes to read "Happy Birthday".

The end result looked like the baby may have made them, but!  They tasted great and was a cute alternative to a traditional birthday cake.  These would be fun for any kind of party and super fun for kids.  I guess I'll have to work on my decorating skills for future kid birthday parties.....